Table of Contents
In my previous blog posts, I was looking into the newer Microsoft Entra Cloud Sync and how to configure it. For customers that have removed tier 2 devices that was hybrid joined,
switching from the older Microsoft Entra Cloud Connect to the newer Sync edition, could give some added features and support the company workflow for “joiner / leaver” of employees.
In this blog post, I look into how to leveage Microsoft Entra Identity Governance > Lifecycle Workflows. This cool setup allows IT-admins to automate numerous tasks related to onboarding and offboarding of employees.
If your company have a hybrid setup with on-premies Active Directory synced to Entra ID – and you have switched from the older Cloud Connect to the newer Cloud Sync, you may still way to benefit from Lifecycle Workflows.
Pre-requisites
Because the users are going to been synced from Active Directory, the “EmployeeHireDate” field in Entra ID is not going to get managed from Entra ID. And since this field does not exist in Active Directory, we have to make a custom mapping first.
In Active Directory, I choose to use the field msDS-cloudExtensionAttribute1.
The value for employeeHireDate attribute should be created in a specific format. Otherwise, the value will not be populated correctly in Entra ID. The format for value is “yyyyMMddHHmmss.fZ“. In my demo, I used 16th March 2025 as the hire date. So the format of the value should be 20250316080000.0Z (In use 08:00 as the starting time).

Switching over to Entra ID > Hybrid Management > Microsoft Entra Connect and then Cloud Sync. Go into your configuration for AD to Entra ID sync:

Under Attribute Mapping,

add the following custom mapping:

Configure Lifecycle Workflow in Entra ID Identity Governance
In Entra ID > Identity Governance | Lifecycle Workflows, you should create a new workflow:

For my demo, I choose the template for “onboard new hire employee”:

On the first page in the wizard for template deployment, I leave everything default, but on the “Configure scope”, I setup a few rules to make sure it only applies users within wanted scope:

Click on the “Enable User Account”:

And make sure “Enable on-premies Account” is set to enabled (default is disabled).
Info: Determines if the Microsoft Entra Connect Provisioning Agent will be utilized to enable the user account in on-premises Active Directory.
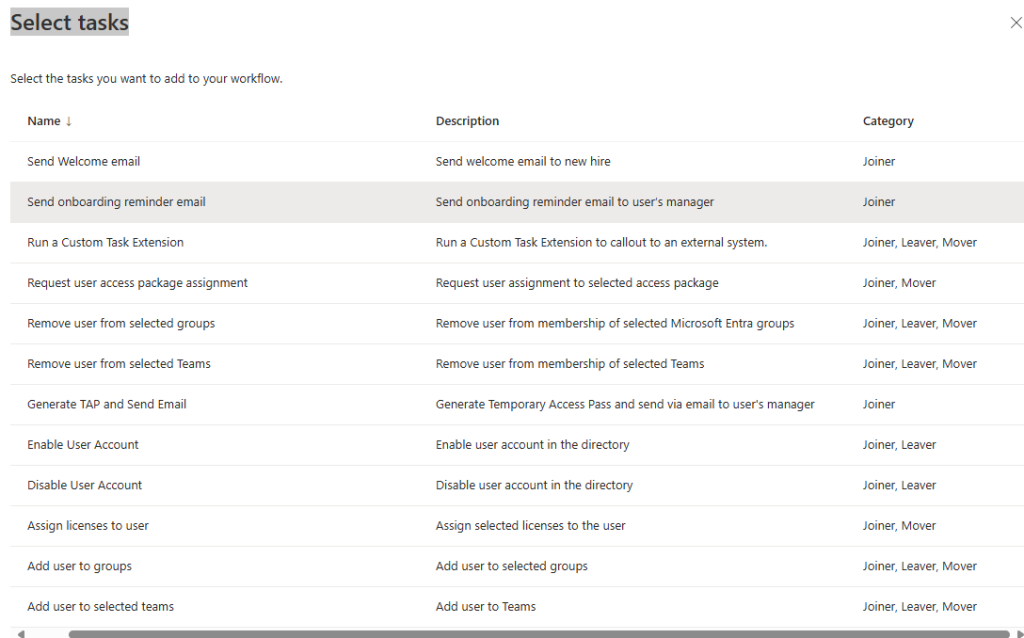
You can also do things like add user to groups, or create new tasks into the template deployment:


On the “review + create” page, enable the schedule for the workflows and create it:

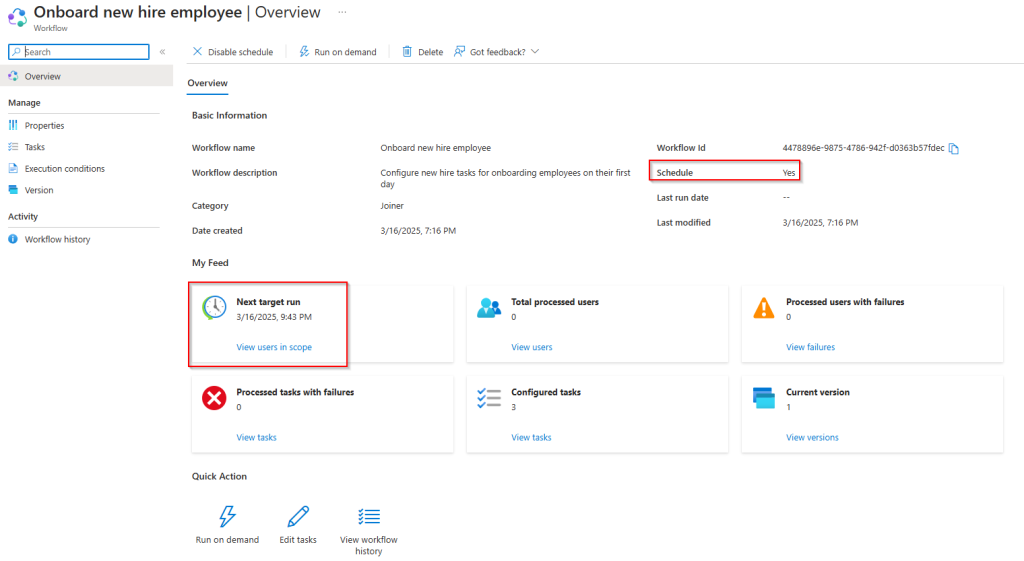
If you now go into the newly created workflow, you can see settings like if schedule is enabled and then next processing is scheduled to occur:

Create user in Active Directory
Now you can create a user in Active Directory.
I will not dive into details on how to do that (and you can read my other posts about Microsoft Entra Cloud Sync (Entra Cloud Sync – Lightweight Agent – Cloud Managed – Christoffer Klarskov Jakobsen – Microsoft Architect), that also explains how to create user in Entra ID and “Sync back” to Active Directory (bit of a clickbait but not completly false).
Just remember to put in the hire date in the msDS-cloudExtensionAttribute1 field.
Important: leave the user in a disabled state:

Let the user sync to Entra ID and monitor that Employee Hire date is filled:

Validate configuration with run on demand feature
We can use the “Run on demand” feature to quickly check if our configuration works:

Just select the target user to test on (the user we just created in Active Directory and synced to Entra ID).
Monitor in Active Directory that the user is not switched to enabled state:

In Lifecycle Workflow we can also see that all tasks ran successfully:


Comments