Azure Local - Enable the feature SDN enabled by Azure Arc and attach a NSG to a logical network
- Intro
- Before you start
- Verify that SDN is not enabled
- Choose an SDN prefix
- Prepare DNS for the Network Controller
- Enable SDN with Add-EceFeature
- Create a network security group
- Create network security rules before you associate the NSG
- Associate the NSG with a logical network
Intro
If you open Network security groups on an Azure Local instance that has not been prepared for it, the portal tells you that network security groups (NSGs) are not available, because Software Defined Networking (SDN) enabled by Azure Arc is not configured on the cluster.
In this article I will walk through how I enabled SDN on my Azure Local instance with a single PowerShell action plan, how I prepared DNS for the Network Controller, and how I then created an NSG and attached it to a logical network in the Azure portal.
If you want to read about the design choice between attaching NSGs to logical networks or to VM network interfaces, I covered that in Azure Local - Network Security Groups with SDN: logical network vs VM NIC association.
Before you start
Read these points before you run anything. They are taken from the Microsoft Learn article on enabling SDN:
- Once you enable SDN, you can’t roll back or disable it.
- Azure Local must run version 2506 or later with OS build 26100.xxxx or later.
- You need access to a node of the instance with the Azure Stack HCI administrator role to run the cmdlet.
- Network Controller is installed as a Failover Cluster service. Workloads can experience a short network disruption while the SDN policies are applied, so plan a maintenance window on production environments.
- Do not run this method if you already run Network Controller on the cluster, deployed using on-premises tools.
- Only Azure Local VMs deployed from Azure client interfaces (portal, Azure CLI, ARM) are in scope for NSGs with this feature.
Verify that SDN is not enabled
Before the change, go to your Azure Local resource in the Azure portal and open Resources > Network security groups. On a cluster without SDN enabled, you are shown this:
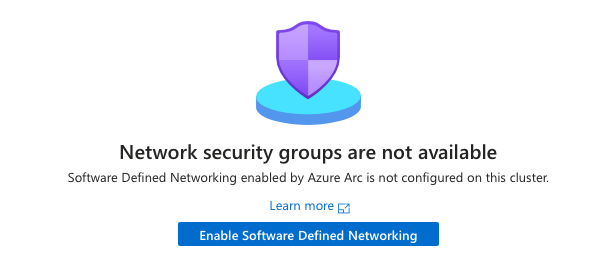
The page links to the documentation and offers an Enable Software Defined Networking button. In this article I use the PowerShell action plan described below.
Choose an SDN prefix
The Add-EceFeature cmdlet requires an SDN prefix. According to Microsoft Learn the prefix:
- must not be empty
- must be eight characters or fewer
- may only contain letters, numbers and hyphens, but no two consecutive hyphens and it must not end with a hyphen
If the prefix does not meet the requirements, the enablement fails. In my environment I use azl-aal.
Prepare DNS for the Network Controller
The Network Controller REST name is derived from your prefix as <SDNPrefix>-NC. This name needs an A record in DNS that resolves to the reserved Network Controller IP address.
- Dynamic DNS (for example AD-integrated): No action is needed, the action plan creates the record for you.
- Static DNS: Create the A record before you run the cmdlet. Microsoft Learn states that the record must resolve to the reserved IP, which is the 5th IP address in the management IP range you provided when you deployed the instance.
In my environment I created the record manually. With the prefix azl-aal the record is azl-aal-nc, pointing to 192.168.0.234:

HINT
The DNS record must not already exist as something else. If your DNS server does not support dynamic updates, the cmdlet will warn you and ask you to confirm that you have created the record.
Enable SDN with Add-EceFeature
-
Connect to a node of your Azure Local instance, for example via RDP or PowerShell remoting, with an account that has the Azure Stack HCI administrator role.
-
Open PowerShell and run the action plan.
NCis the only supported value for-Name:Add-EceFeature -Name NC -SDNPrefix azl-aal
-
The cmdlet generates the Network Controller certificates, finds the reserved management IP address and uses it for the Network Controller REST name. If your DNS server does not support dynamic updates, you are asked to confirm that the DNS A record has been created:

Answer
Yesonce the record exists. You are also asked to acknowledge the maintenance window. -
Wait for the action plan to complete. Microsoft Learn states that this can take up to 20 minutes. When it is done, the output ends with the
SetMOCSDNEnabledaction showingStatus : Completedand the messageSDN installation completed.: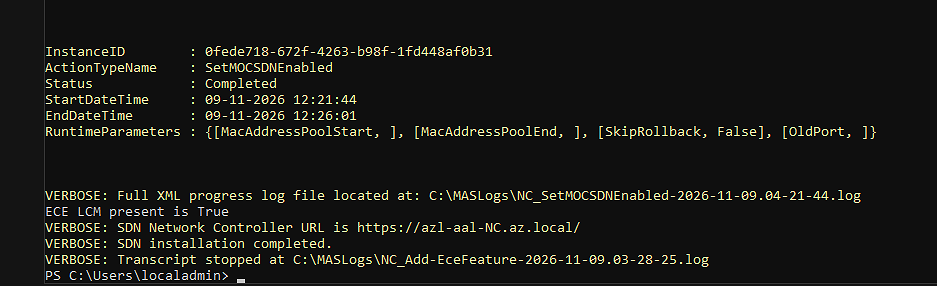
The output also shows the Network Controller URL, in my case
https://azl-aal-NC.az.local/, and the path to the transcript inC:\MASLogs.
HINT
To run the cmdlet unattended you can use the
-AcknowledgeMaintenanceWindowand-AcknowledgeDNSRecordCreationparameters to skip the confirmation prompts. Only use them when you really have arranged the maintenance window and DNS record.
Create a network security group
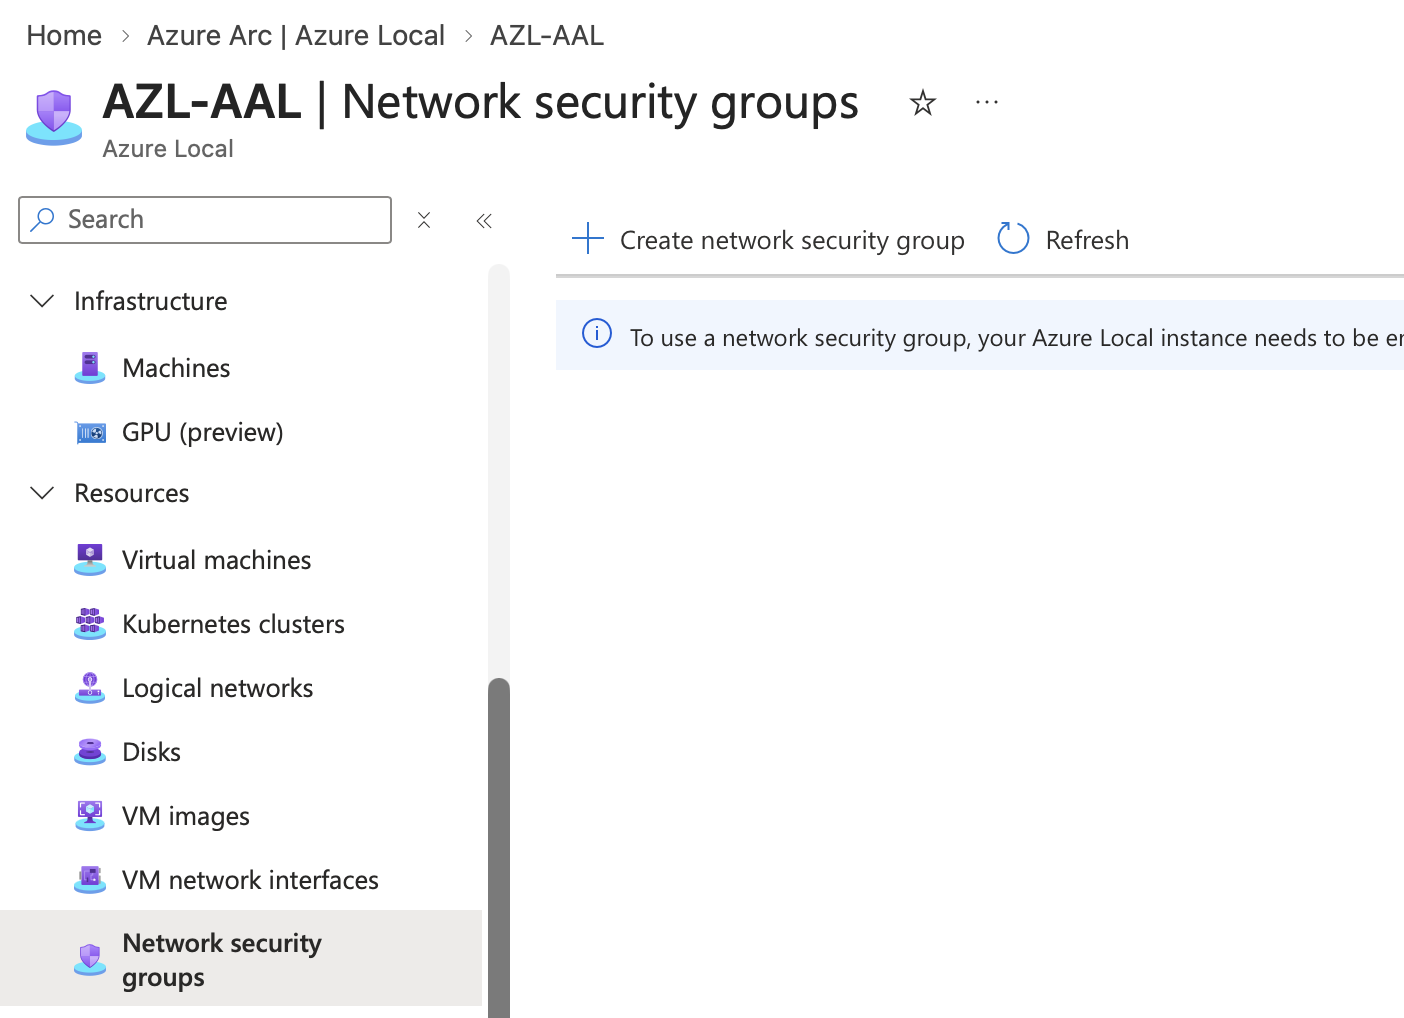
With SDN enabled, the NSG features are available on the Azure Local resource. Create the NSG like this:
-
In the Azure portal, go to your Azure Local resource and select Resources > Network security groups.
-
Select Create network security group in the top command bar.
-
On the Basics tab, select the Subscription and Resource group, and enter a Name. I used
vlan0-nsg. -
Select the Region and the Custom location. Microsoft Learn recommends using the same region as your Azure Local instance, and the custom location must be the one associated with the instance. In my case that is
(Europe) West Europeandazl-aal.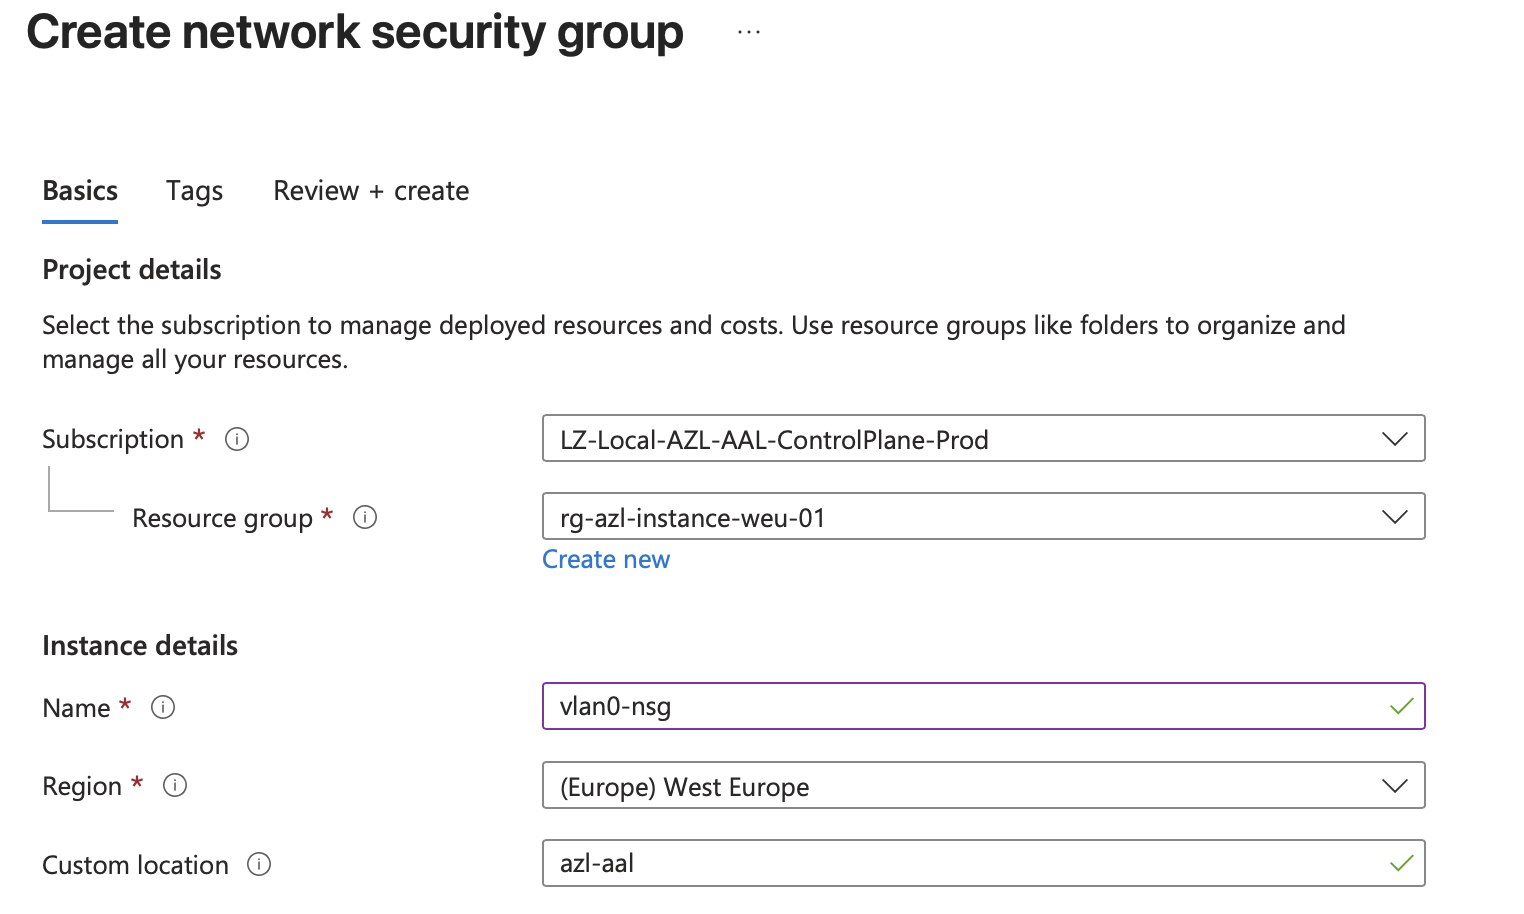
-
Select Review + create, review the settings and select Create.
HINT
Per Microsoft Learn, an NSG must have at least one network security rule. An empty NSG denies all inbound traffic by default, so a VM or logical network associated with an empty NSG is not reachable. Create your rules before you attach the NSG, as described in the next section.
Create network security rules before you associate the NSG
In my example I want the logical network to accept inbound ICMP (ping) and nothing else inbound, while all outbound traffic is allowed. The rules are created on the NSG itself, so do this before you attach the NSG to the logical network.
In the portal there is no Direction field on the rule. The direction is decided by where you create the rule. Microsoft Learn describes it this way: use the same procedure for inbound and outbound rules, and the only difference is the direction. In the left menu of the NSG, under Settings, you find two pages:
- Inbound security rules for traffic entering the network
- Outbound security rules for traffic leaving the network
Each rule is described by Source, Destination, Port, Protocol, Priority and Name, and the rule action is Allow or Deny.
Create the inbound ICMP rule
-
In the Azure portal, go to your Azure Local resource, select Resources > Network security groups and select your NSG, in my case
vlan0-nsg. -
Under Settings, select Inbound security rules.
-
Select Create in the command bar. This opens the Add inbound security rule page.
-
Fill out the rule. According to Microsoft Learn the fields are:
- Source: IP address or Any. If you choose IP address, enter an address or CIDR range.
- Source port ranges: Use
*for any port. - Destination: IP address or Any. If you choose IP address, enter an address or CIDR range.
- Destination port ranges: Use
*for any port. - Protocol: Any, TCP, UDP or ICMP.
- Action: Allow or Deny.
- Priority: A number between 100 and 4096. Lower numbers are processed first.
- Name: Must be unique in the NSG.
- Description: Optional.
-
For my rule I selected ICMP as the protocol with the action Allow, and named it
Allow-ICMP-Inboundwith priority100. ICMP has no ports, so any port field is left at*. Select Add. -
Select Refresh on the page. The rule appears in the list:
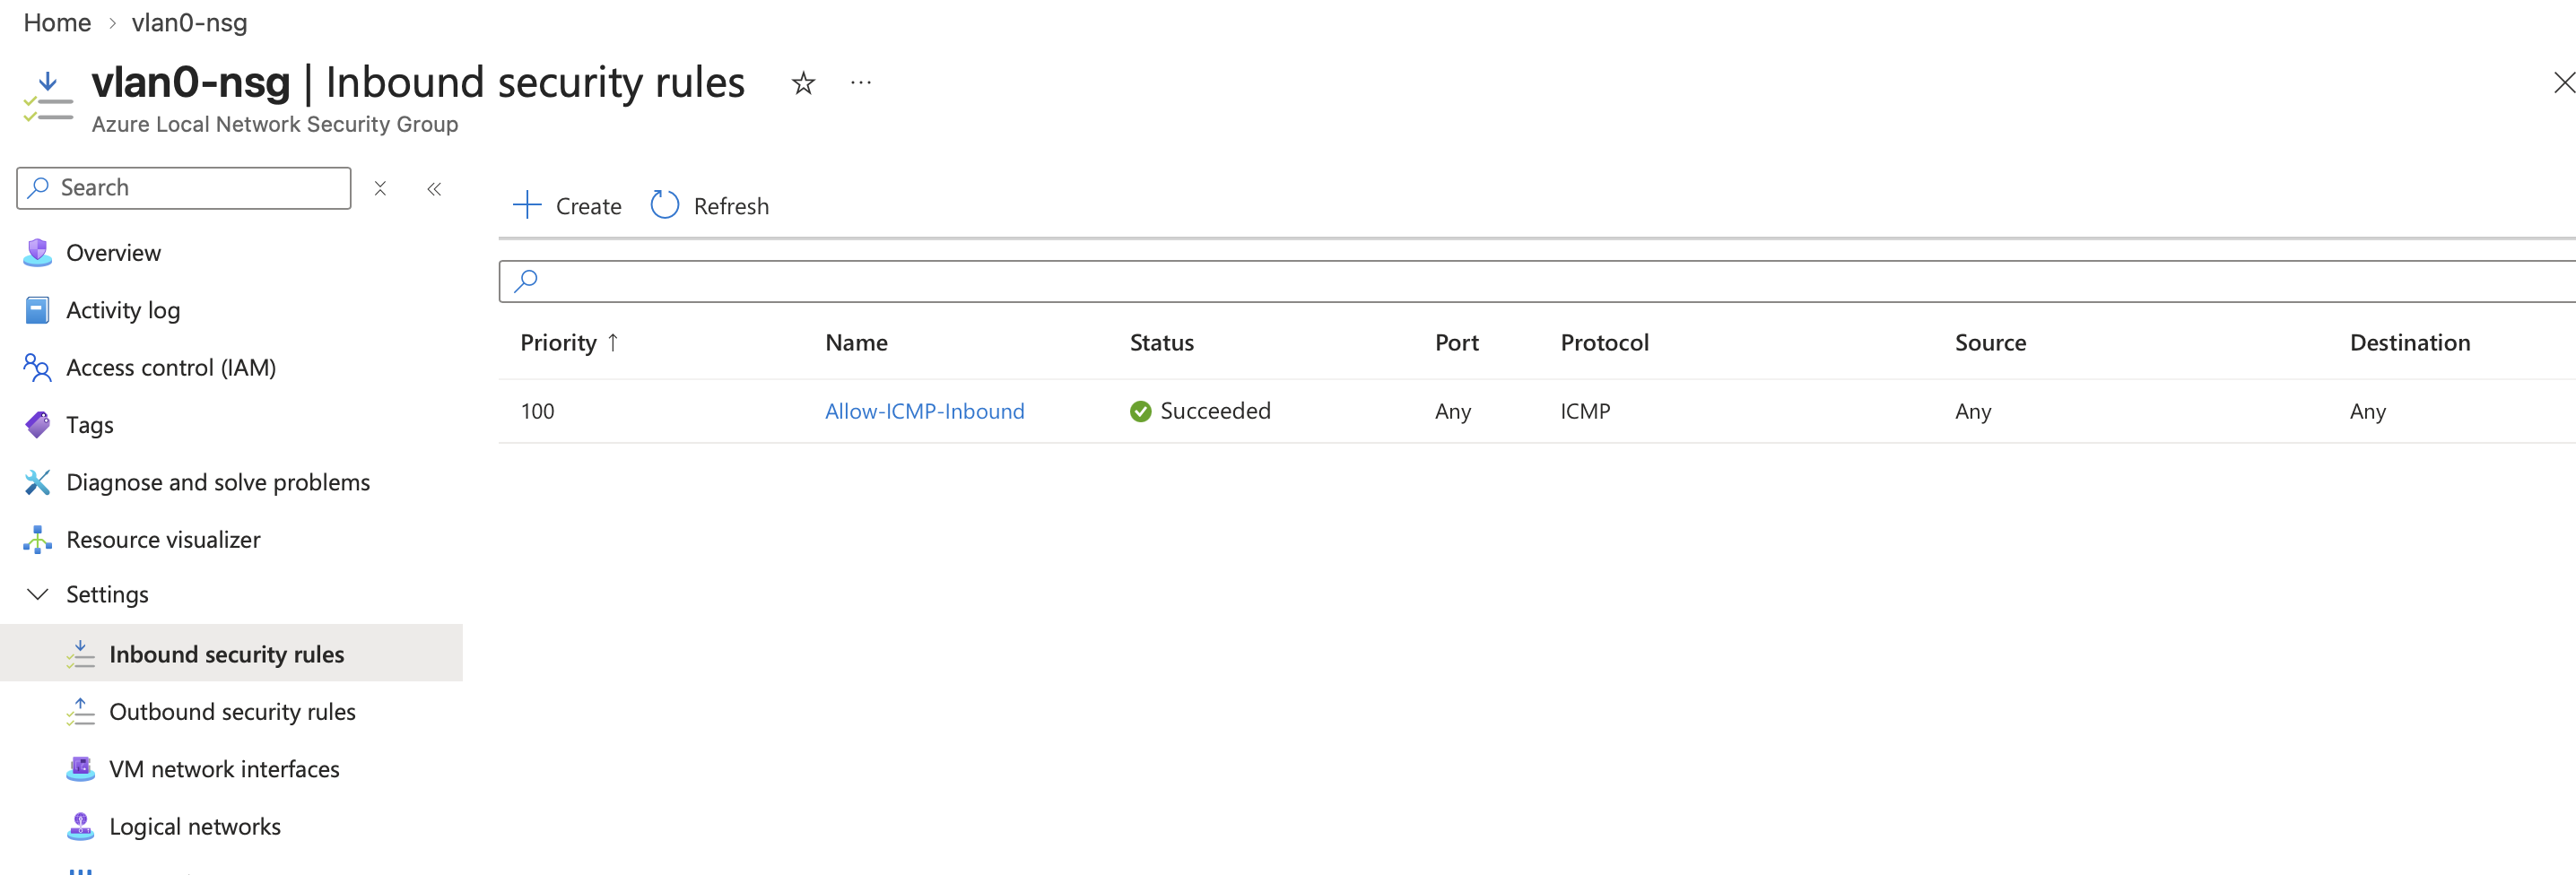
The list view shows the columns Priority, Name, Status, Port, Protocol, Source and Destination. In my environment the rule has the values Any for port, source and destination, and ICMP as protocol. The screenshot is cropped before any further columns, so the action itself is not visible there. It follows from the settings I entered when creating the rule.
HINT
Anyfor source and destination means that ICMP is allowed from and to any address on the logical network. In a real environment, consider limiting the source to your management subnet by choosing IP address and entering a CIDR range.
Create the outbound allow rule
Repeat the procedure on the other page:
-
Under Settings, select Outbound security rules and select Create.
-
Set Source and Destination to Any, the port ranges to
*, Protocol to Any and Action to Allow. -
In my example I named the rule
AllowAnyOutboundand used priority100. Priority is evaluated per rule list, so it does not clash with the inbound rule. Select Add and Refresh.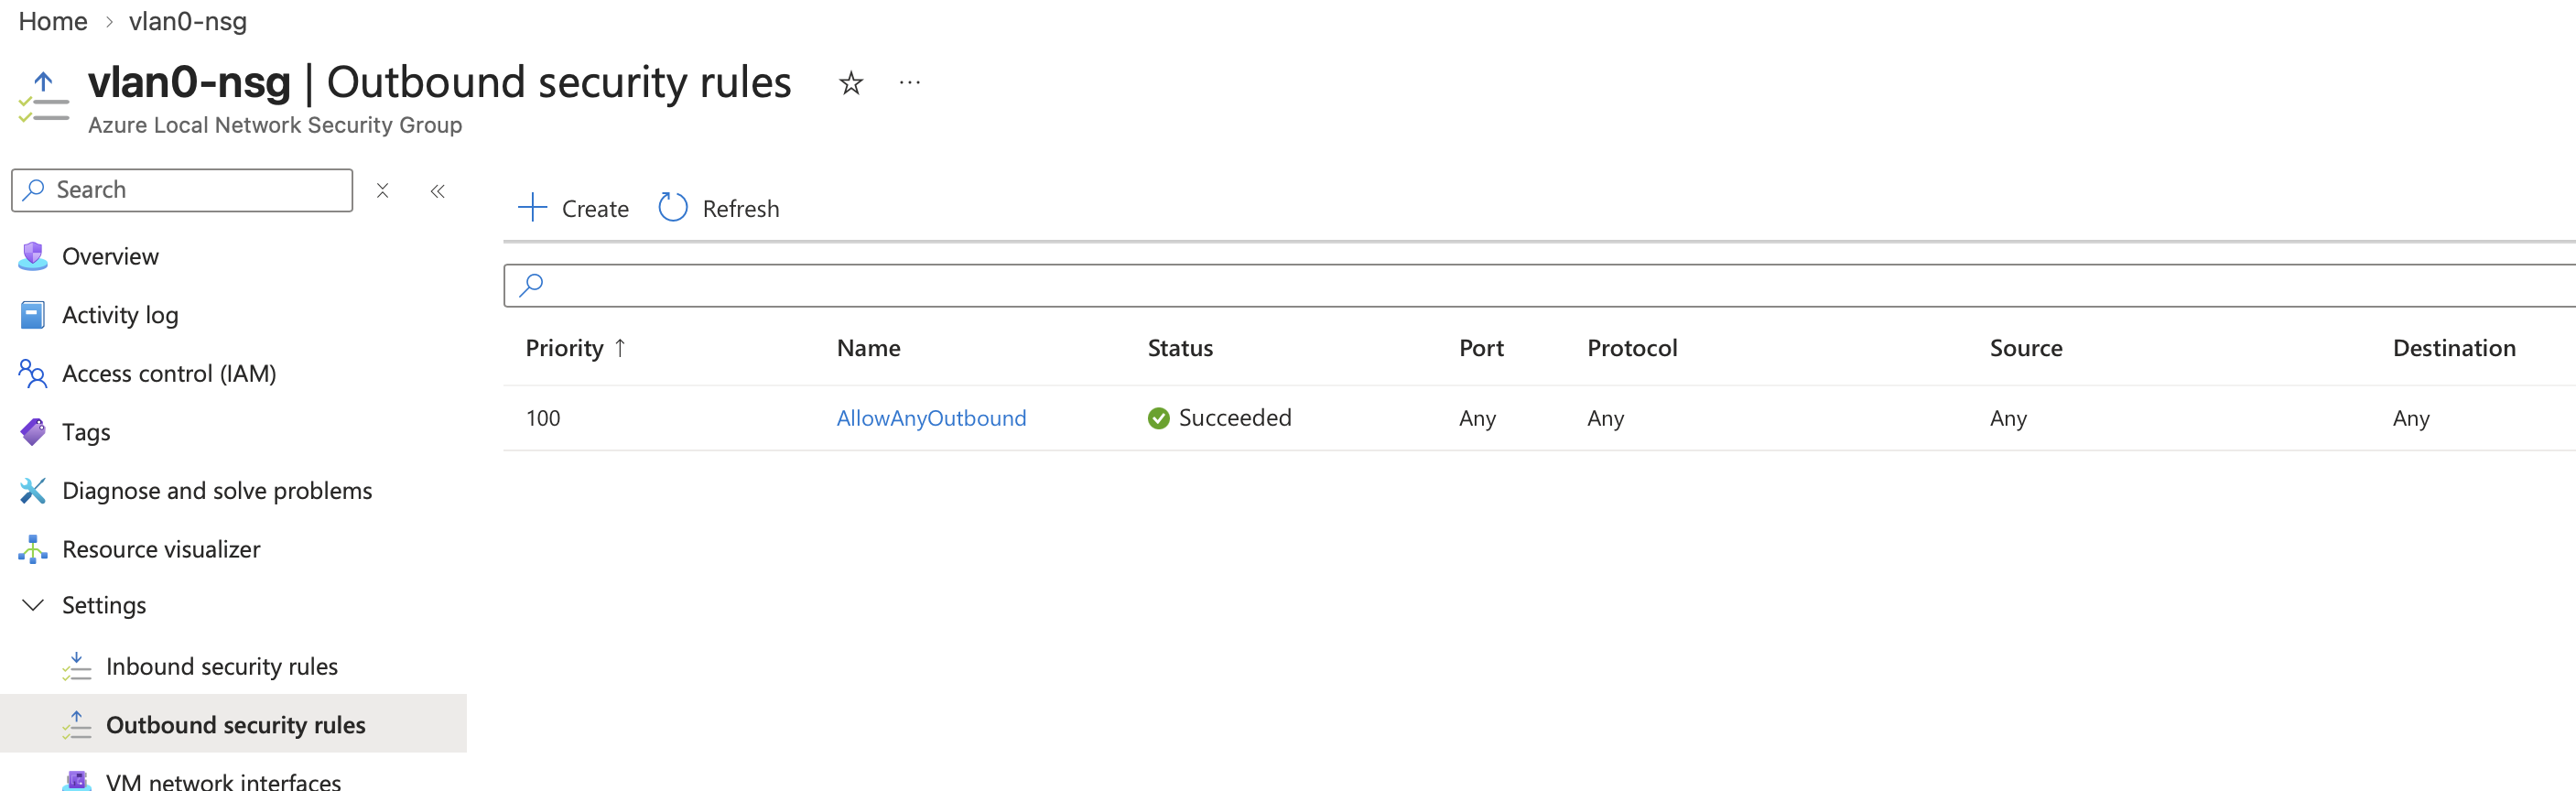
For more details on the rule fields and CLI alternatives, see Create network security groups.
Associate the NSG with a logical network
-
In the Azure portal, go to your Azure Local resource and select Resources > Logical networks.
-
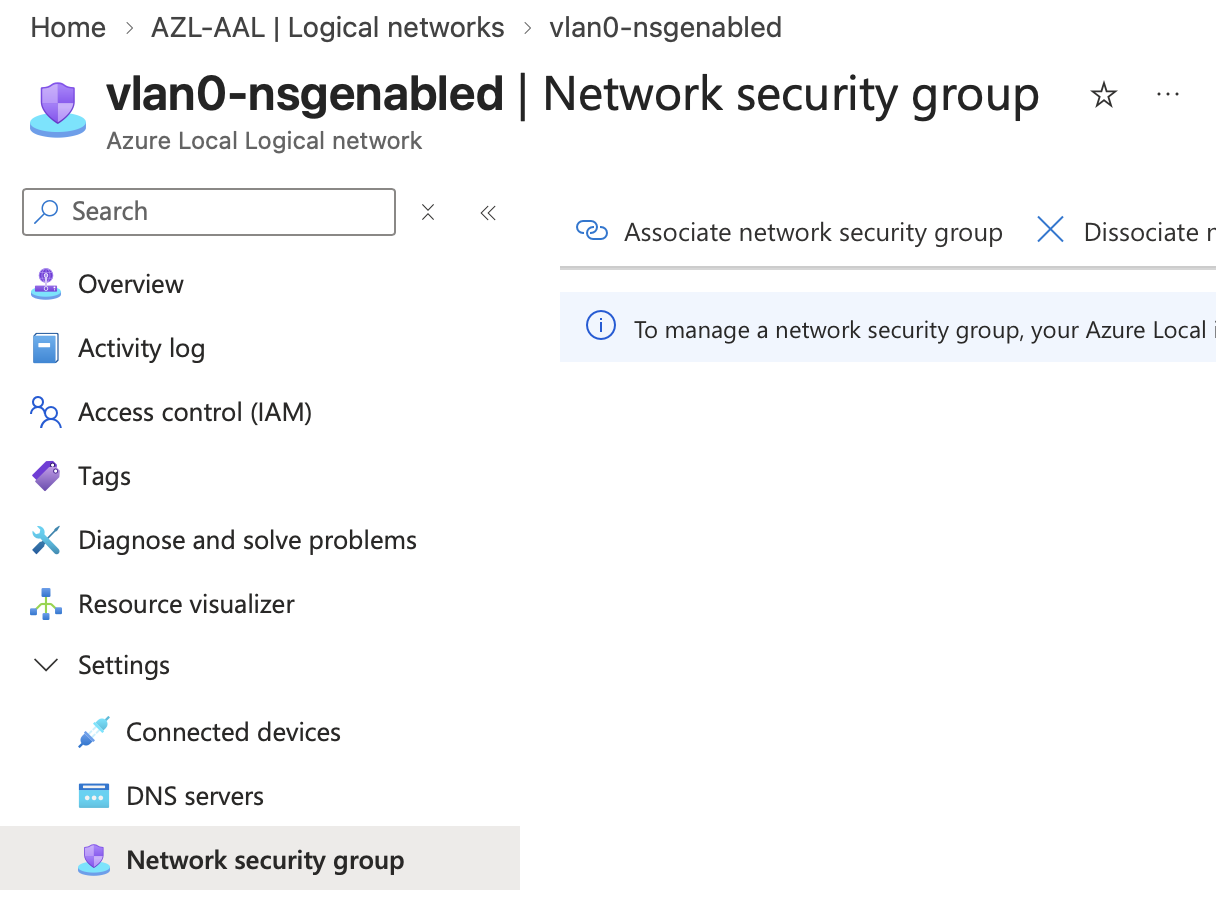
Select the logical network you want to protect. In my example it is
vlan0-nsgenabled. -
Under Settings, select Network security group. The page has the commands Associate network security group and Dissociate network security group:
-
Select Associate network security group, choose your NSG from the dropdown and select Add network security group. Microsoft Learn notes that the operation takes a few minutes, and you can follow it in the Notifications pane. See Manage network security groups for details.
-
When the operation is done, the Network security group page of the logical network shows the associated NSG. Here
vlan0-nsgis attached tovlan0-nsgenabled: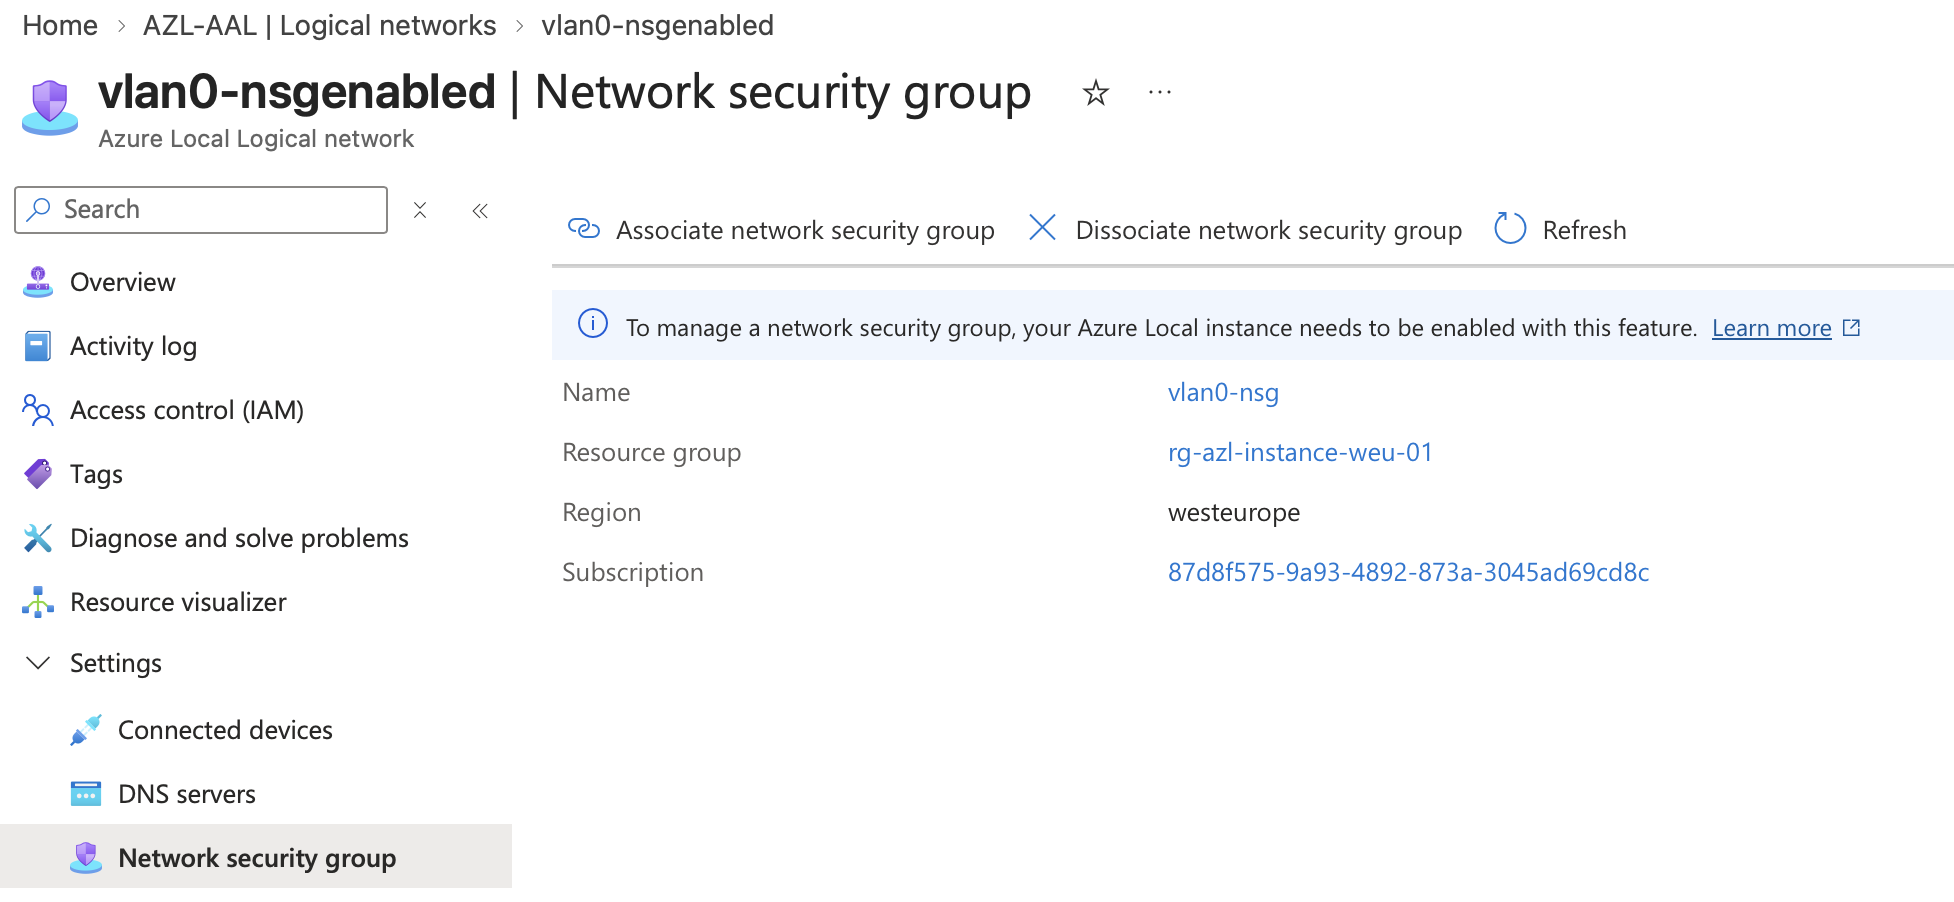
From this point on, the rules in the NSG apply to all VMs connected to that logical network.
HINT
AKS Arc does not support logical networks with an NSG attached. If you plan to run Kubernetes on the same instance, keep a separate logical network without an NSG for those workloads. I described the error in Azure Local - Network Security Groups with SDN: logical network vs VM NIC association.
Have feedback on this post?
Send me a message and I'll get back to you.