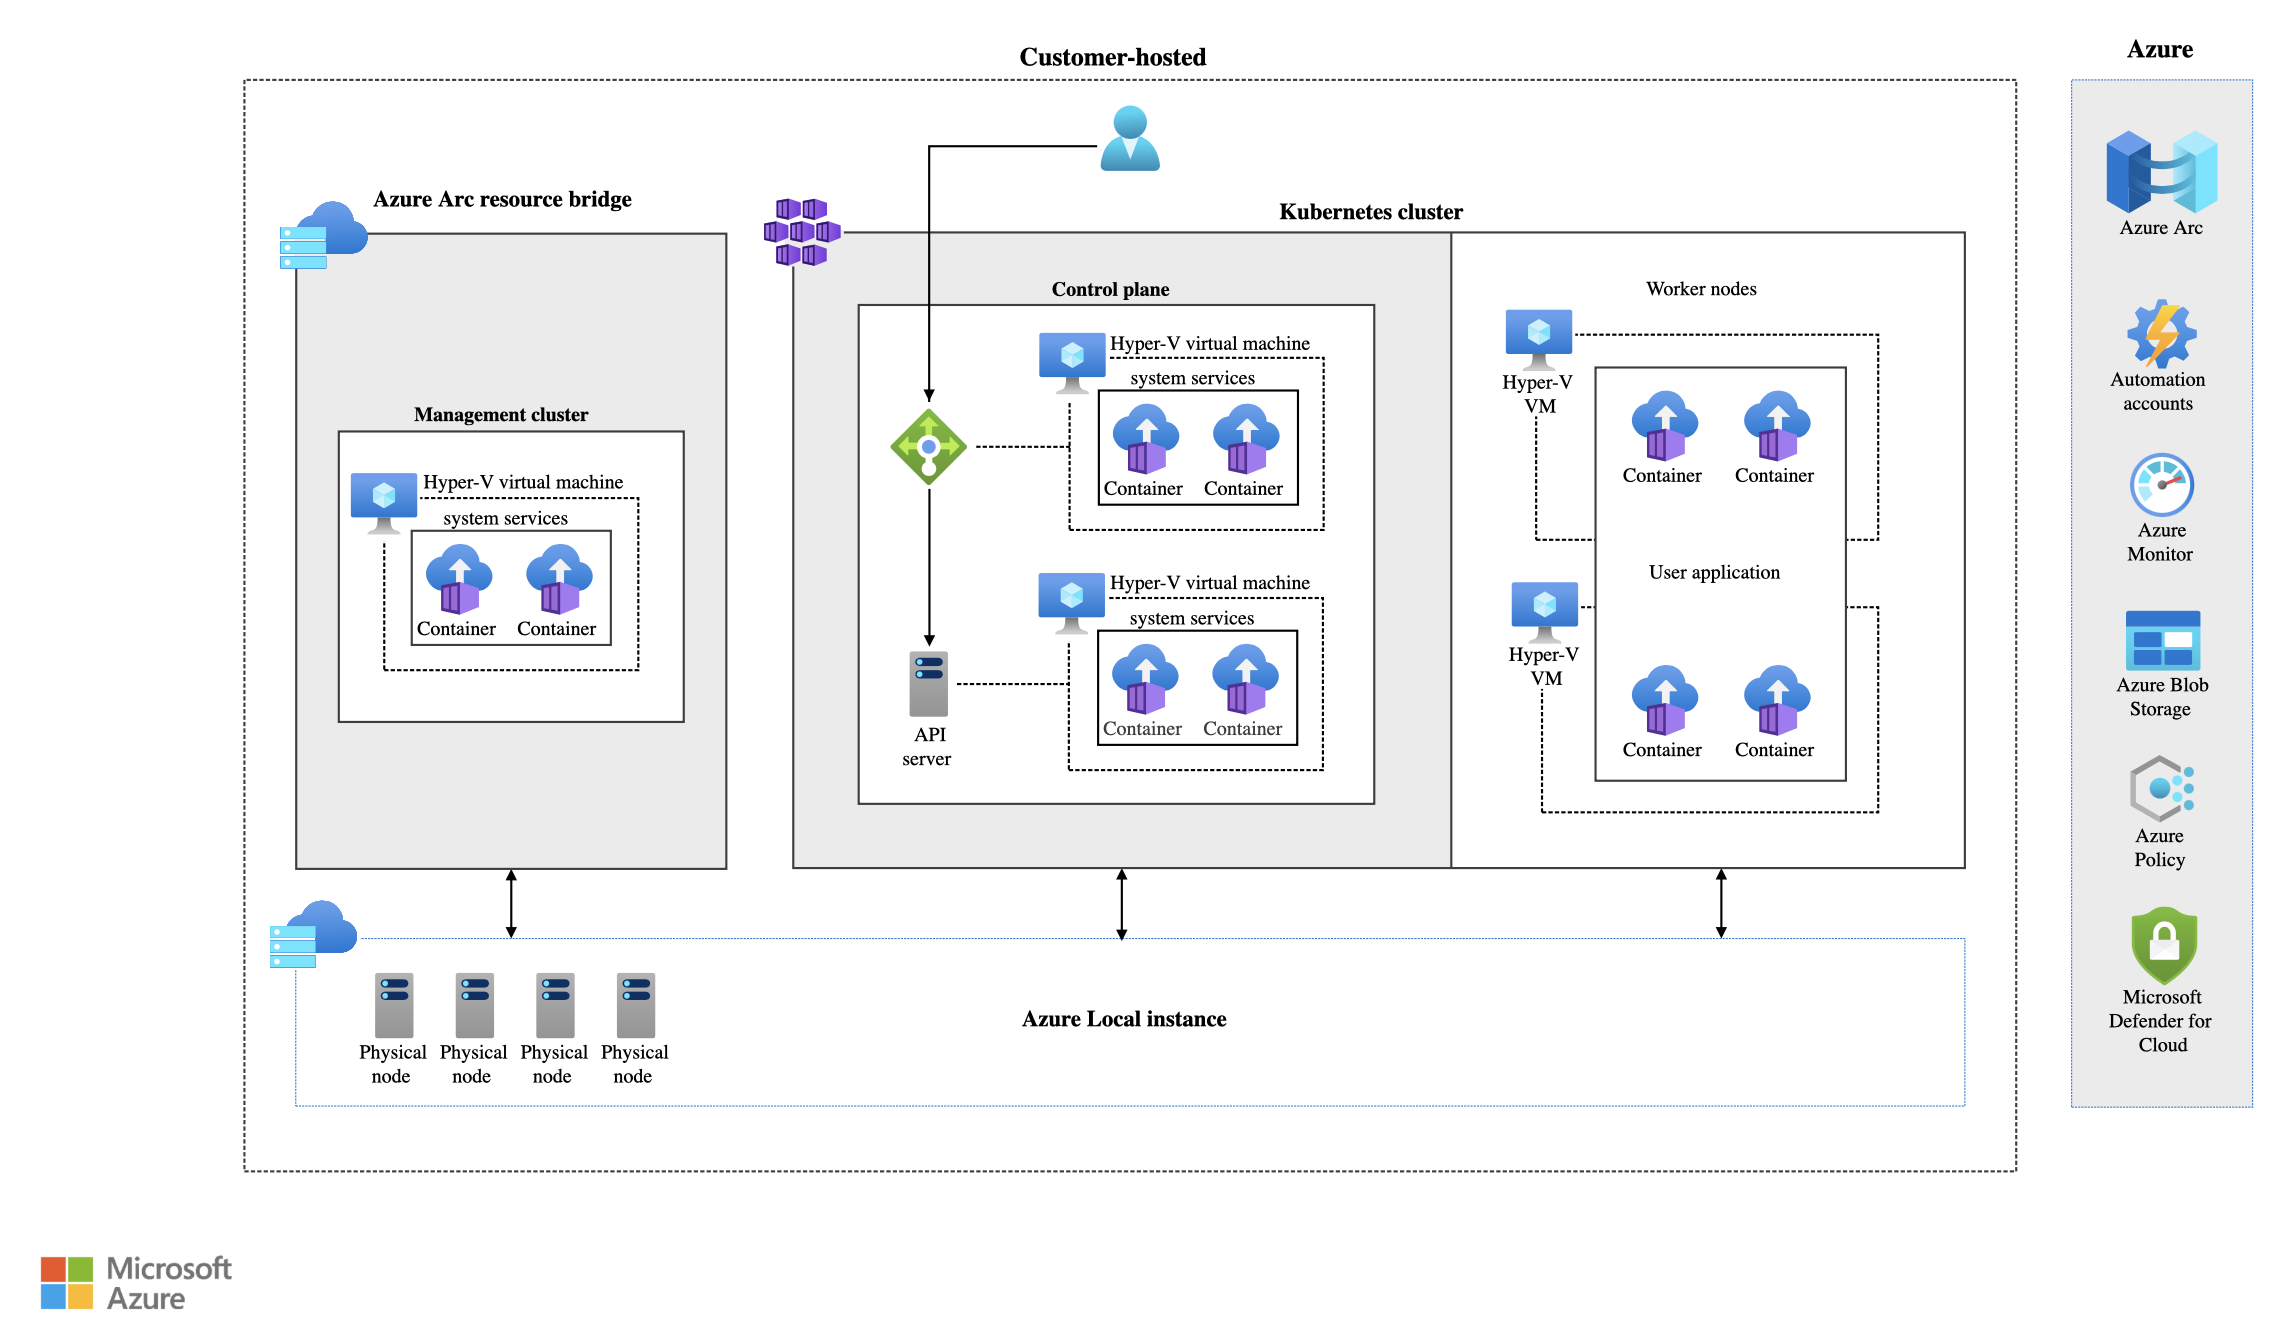
Azure Local - Kubernetes - Part 7 - Deploy Foundry Local (Preview) on Azure Local
- Intro
- Update (July 2026) — major version
- Prerequisites
- Step 0 — Install new networking prerequisites (Gateway API + Istio)
- Step 1 — Browse the marketplace tile
- Step 2 — Create an Entra ID application for the operator
- Step 3 — Install the cert-manager extension (prerequisite)
- Step 4 — Deploy the Foundry Local extension
- Existing installation? Upgrade options
- Step 5 — Browse the model catalogue
- Step 6 — Deploy a model
- Step 7 — Get the API key and reach the endpoint
- Step 8 — Verify the model is healthy from inside the pod
- Step 9 — Call the chat completions API
- Final remark
Intro
This article is part of a series: Navigate to series page
Foundry Local on Azure Local (Preview) brings the Foundry model runtime to your on-premises Kubernetes cluster on Azure Local. You deploy a Kubernetes extension (Microsoft.Foundry) that provisions an inference operator into your cluster, and from there you can deploy curated models from the Foundry catalogue as ModelDeployment custom resources.
This article is updated with the latest private preview guidance I received for version 1.260630.4 (major version bump from 0.x to 1.x) and the related breaking changes. I also include my practical path where I completely uninstalled and then reinstalled the Foundry extension instead of running an in-place upgrade.
Update (July 2026) — major version 1.260630.4
Microsoft released Foundry Local on Azure Local version 1.260630.4 (2026-06-30) with breaking changes and asks preview users to upgrade/reinstall.
Key points from the update:
- Major version bump (
0.x->1.x) - Gateway API routing and External Processing Pipeline (EPP) changes
- Foundry Local SDK update to
v1.2.0 - Region-aware catalog sync
- API key provisioning idempotency improvements
/v1/chat/completionscompatibility fixes for array-form content and tool arrays
Useful links from the update notice:
- Supported models:
https://aka.ms/FL_Models - Arc extension deployment/update guide (official):
https://learn.microsoft.com/en-us/azure/azure-sovereign-clouds/private/foundry-local/how-to-update-arc-extension
Prerequisites
Before you start, make sure the following is in place:
- An Azure Local cluster with a healthy Kubernetes cluster deployed and Arc-connected. In my case the cluster is
azlckj5-k8sin resource grouprg-weu-ckj-prod. kubectlconfigured against the cluster — see Part 2 - Connect to Kubernetes cluster.- The
k8s-extensionAzure CLI extension. If you do not have it, the CLI will prompt to install it dynamically the first time you run anaz k8s-extensioncommand. - Your subscription must be enabled for the gated Foundry Local on Azure Local (Preview) offer. There is an Application for Gated Services link in the marketplace tile — fill it out if you have not been granted access yet.
helmavailable on the server you run commands from (if not, install it first).
Step 0 — Install new networking prerequisites (Gateway API + Istio)
With the new major version, Gateway API/Istio prerequisites are important for the routing stack.
0.1 Install Gateway API CRDs
kubectl apply --server-side -f https://github.com/kubernetes-sigs/gateway-api/releases/download/v1.4.0/standard-install.yaml
kubectl apply --server-side -f https://github.com/kubernetes-sigs/gateway-api-inference-extension/releases/download/v1.5.0/manifests.yaml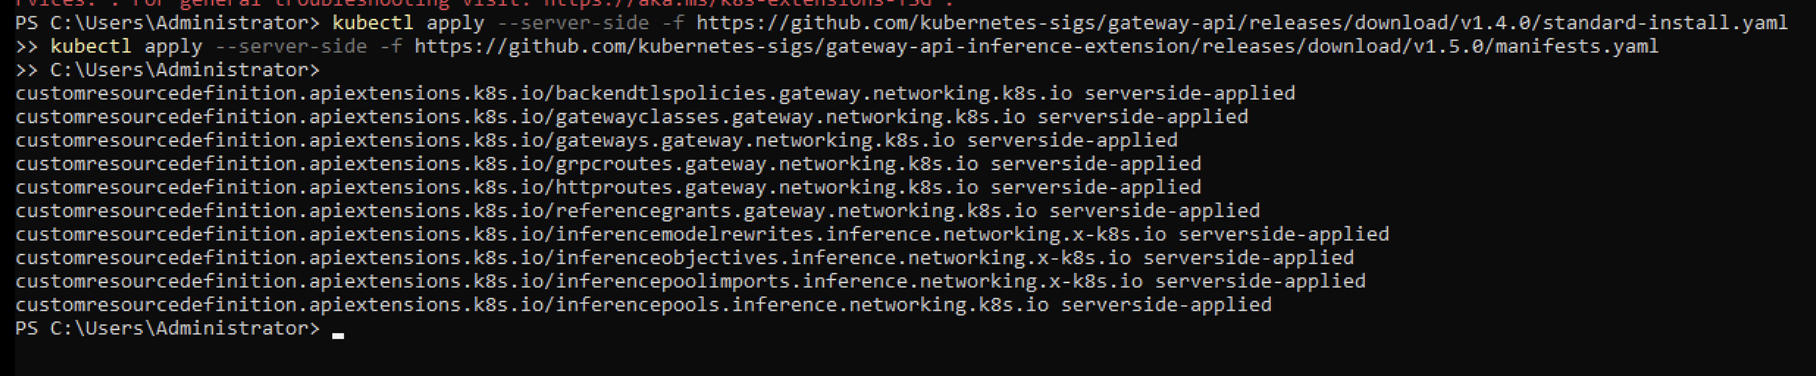
0.2 Install Helm if it is missing
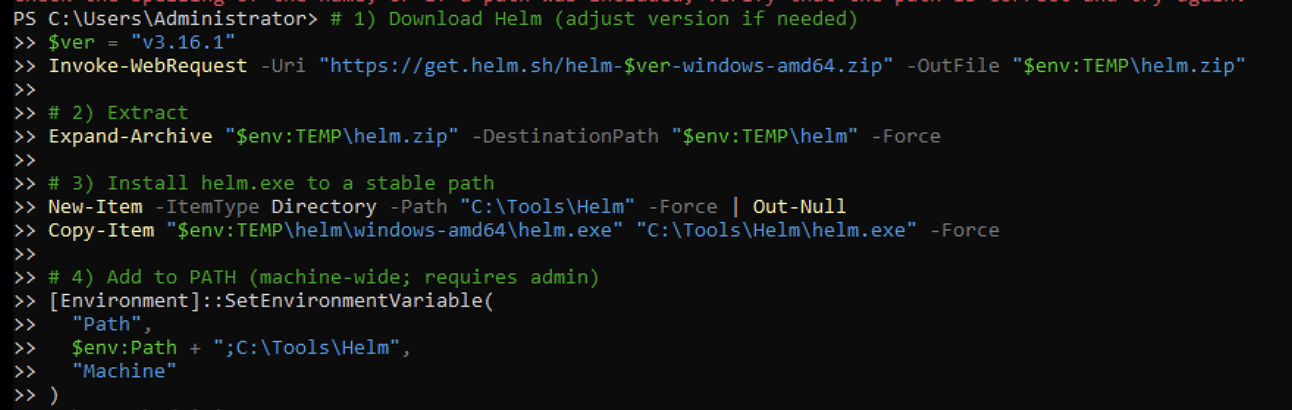
If helm is not recognized on your server, install it first (ZIP-based install path works well on Windows Server):
# 1) Download Helm (adjust version if needed)
$ver = "v3.16.1"
Invoke-WebRequest -Uri "https://get.helm.sh/helm-$ver-windows-amd64.zip" -OutFile "$env:TEMP\helm.zip"

# 2) Extract
Expand-Archive "$env:TEMP\helm.zip" -DestinationPath "$env:TEMP\helm" -Force

# 3) Install helm.exe to a stable path
New-Item -ItemType Directory -Path "C:\Tools\Helm" -Force | Out-Null
Copy-Item "$env:TEMP\helm\windows-amd64\helm.exe" "C:\Tools\Helm\helm.exe" -Force

# 4) Add to PATH (machine-wide; requires admin)
[Environment]::SetEnvironmentVariable(
  "Path",
  $env:Path + ";C:\Tools\Helm",
  "Machine"
)
0.3 Install Istio base and control plane
helm repo add istio https://istio-release.storage.googleapis.com/charts
helm repo update

helm install istio-base istio/base -n istio-system --create-namespace --wait
helm install istiod istio/istiod -n istio-system --set pilot.env.ENABLE_GATEWAY_API_INFERENCE_EXTENSION=true --wait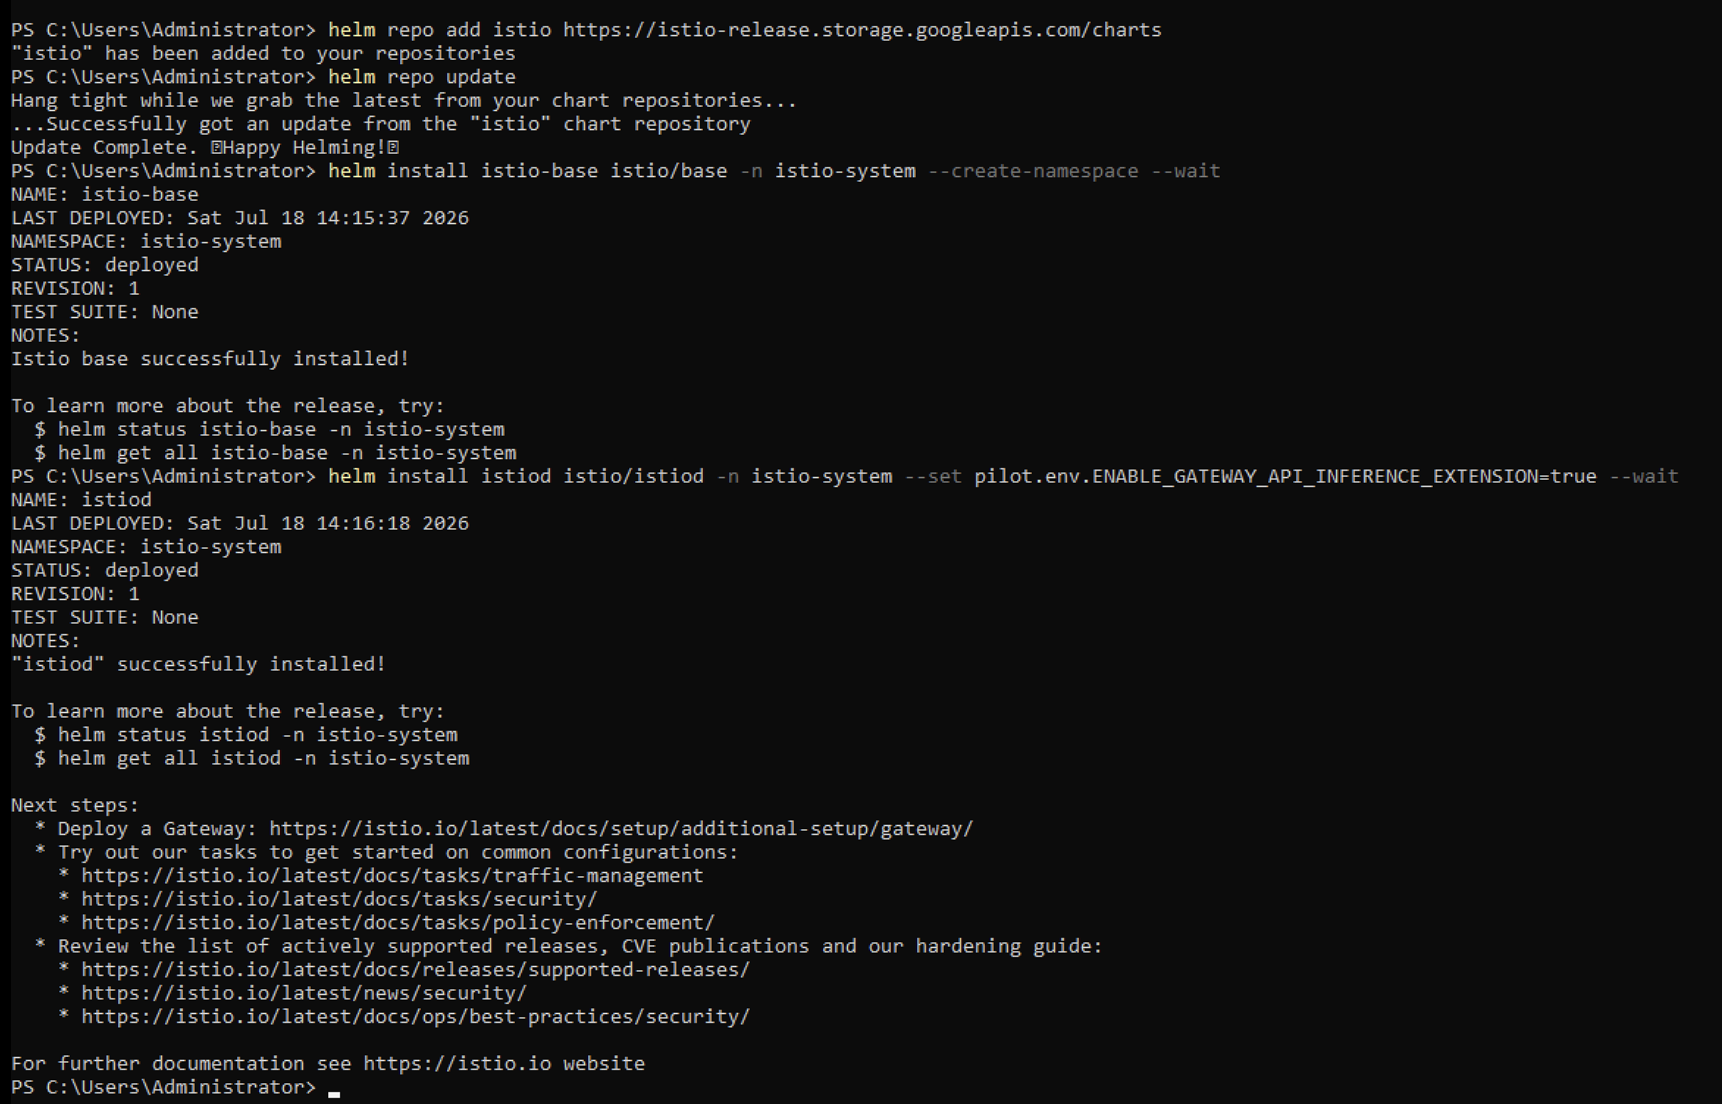
0.4 Verify GatewayClass
kubectl get gatewayclass istio
Step 1 — Browse the marketplace tile
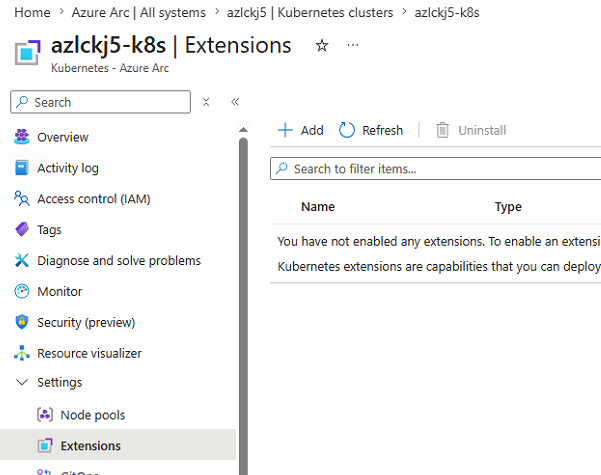
Navigate to the Kubernetes cluster resource in the Azure Portal, go to Settings → Extensions, and click + Add.
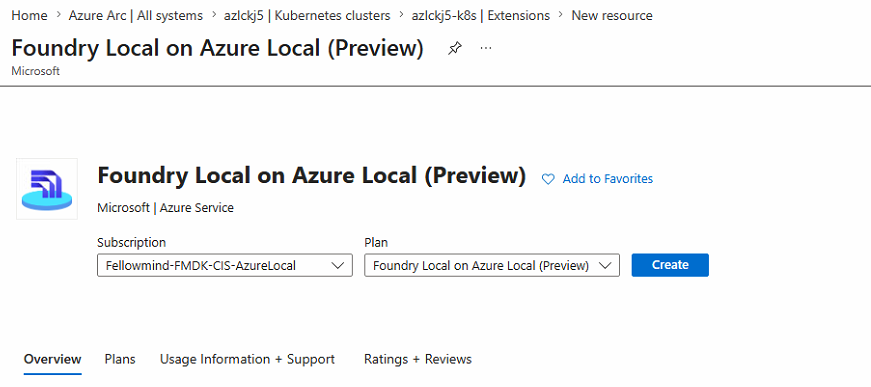
In the marketplace search for Foundry Local, you will find the tile Foundry Local on Azure Local (Preview) published by Microsoft.

Open the tile, select your subscription and plan, and click Create.
HINT
If your subscription is not yet enabled for the preview, the Create wizard will show a banner pointing to the Application for Gated Services form. Submit it and wait for the approval before continuing.
Step 2 — Create an Entra ID application for the operator
The Foundry Local extension uses Microsoft Entra ID to authenticate calls to the inference operator API. Before deploying the extension you need an Entra application (app registration) and its Application (client) ID and the Directory (tenant) ID.
I created a new app registration named azlckj5-k8s-foundry-local in my tenant. Take note of the client ID and tenant ID — you will need both in the next step.
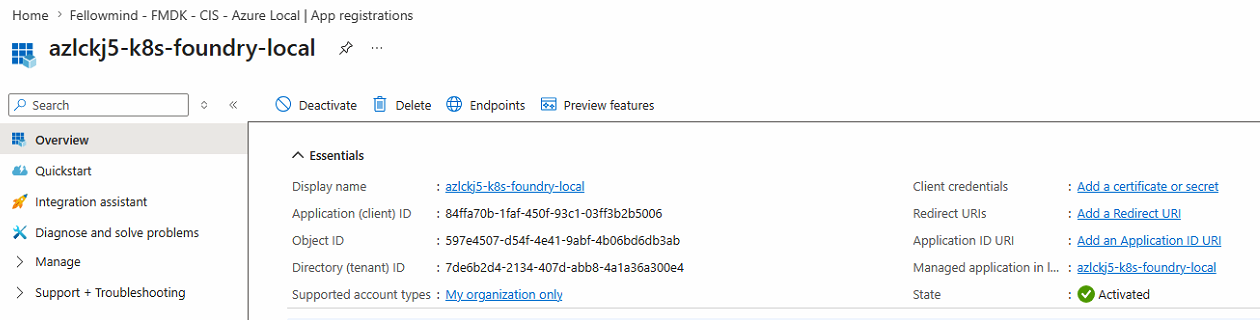
In my case:
- Tenant ID:
7de6b2d4-2134-407d-abb8-4a1a36a300e4 - Client ID:
84ffa70b-1faf-450f-93c1-03ff3b2b5006
Step 3 — Install the cert-manager extension (prerequisite)
The Foundry Local extension depends on cert-manager and trust-manager being available in the cluster for the operator’s webhook certificates. I installed it via the Azure CLI:
az k8s-extension create `
  --cluster-name "azlckj5-k8s" `
  --name "azure-cert-manager" `
  --resource-group "rg-weu-ckj-prod" `
  --cluster-type connectedClusters `
  --extension-type Microsoft.CertManagement `
  --scope cluster `
  --release-train stable `
  --config config.enableGatewayAPI=true `
  --config cert-manager.crds.keep=true `
  --config trust-manager.defaultPackage.enabled=false `
  --config trust-manager.secretTargets.enabled=true `
  --config trust-manager.secretTargets.authorizedSecretsAll=true
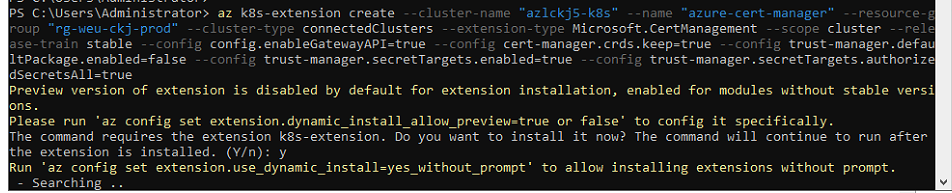
Because this extension type is a preview, the CLI will prompt to allow dynamic installation of the k8s-extension CLI extension and to enable preview-versioned extensions. Answer y to both prompts.
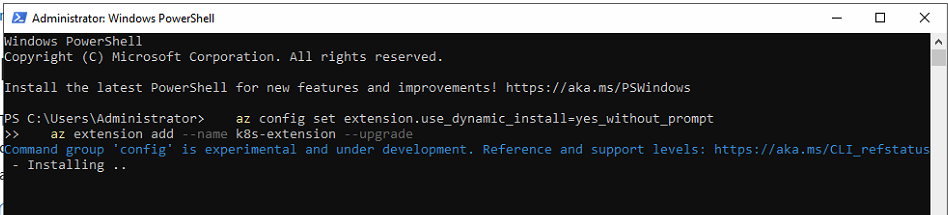
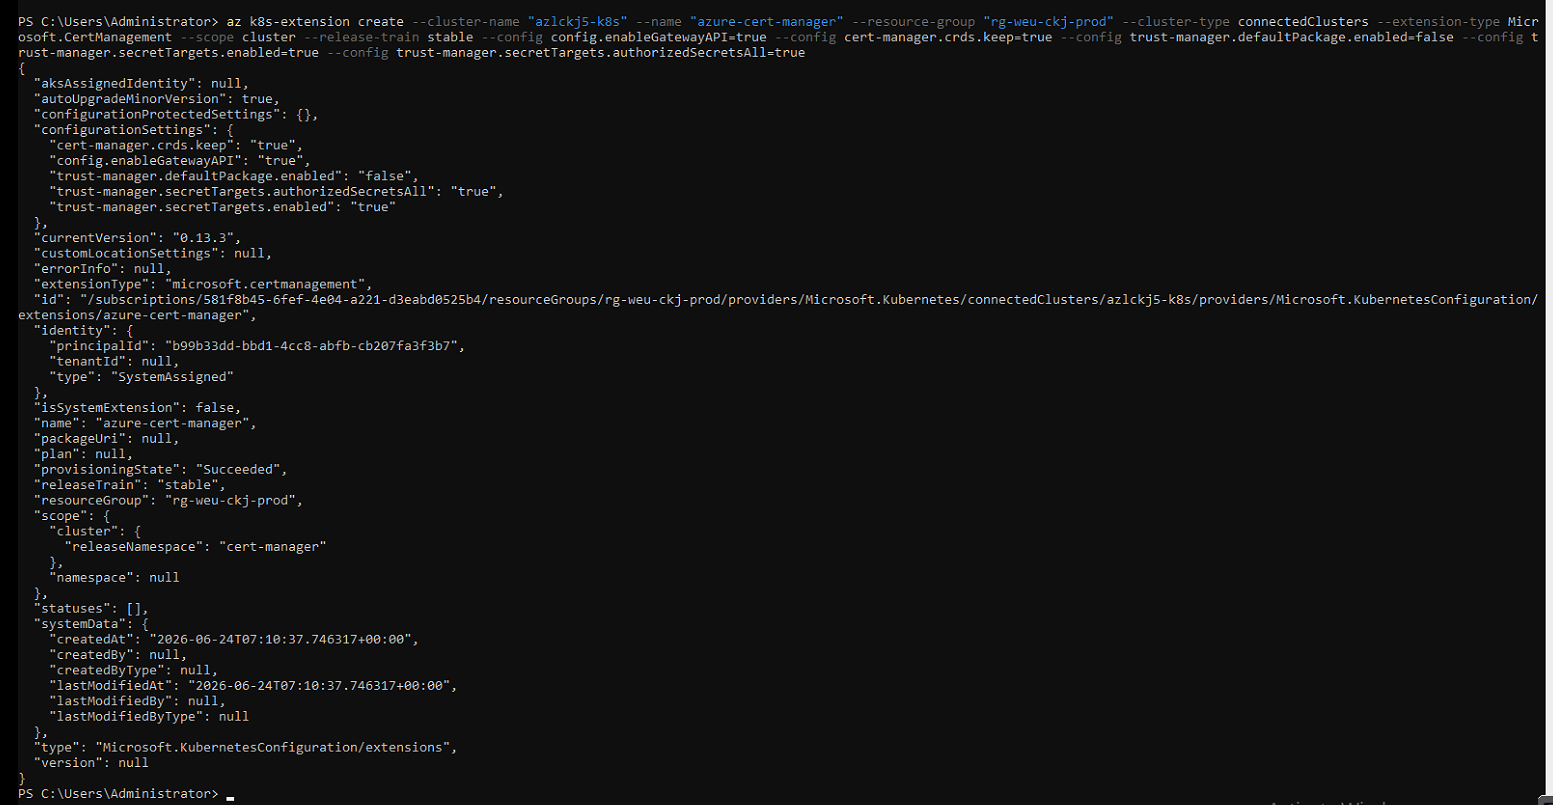
After a few minutes the deployment returns with provisioningState: Succeeded.
Step 4 — Deploy the Foundry Local extension
You can either continue through the portal wizard from Step 1 or use the Azure CLI.
Option A — Portal wizard
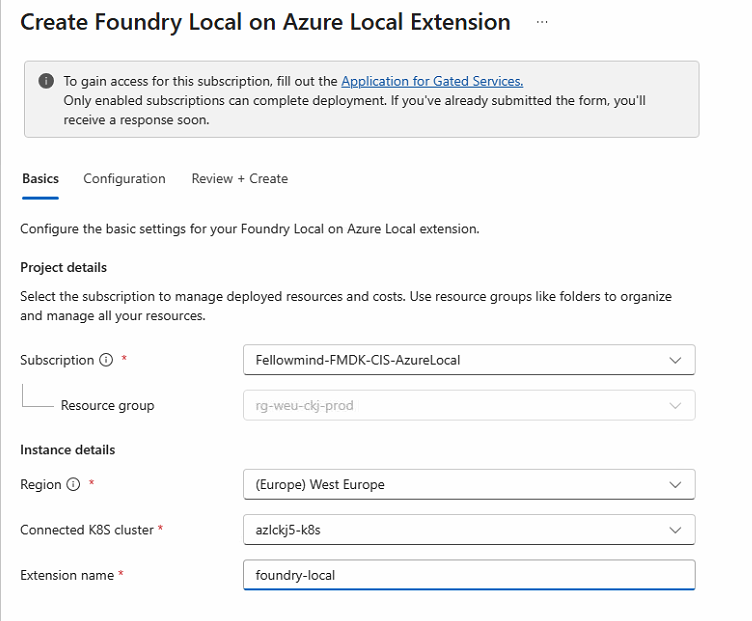
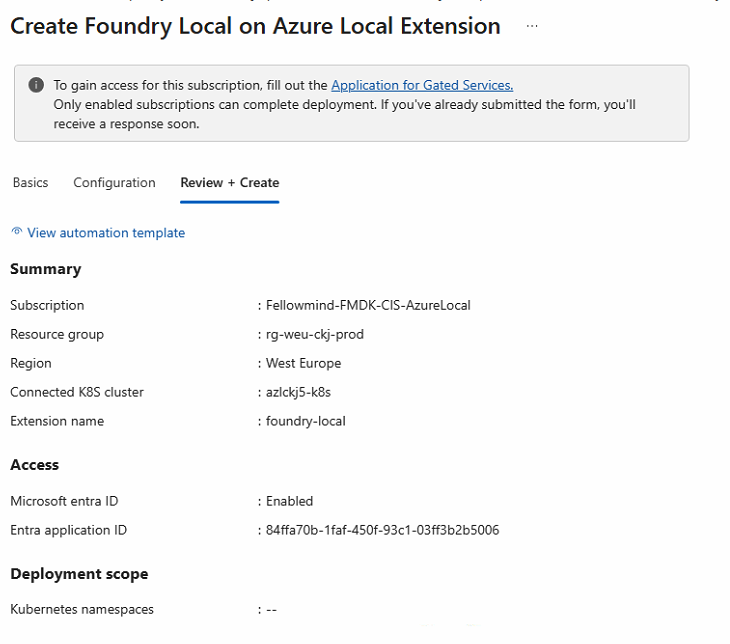
On the Basics tab, set the subscription, region, the connected K8s cluster, and the extension name.
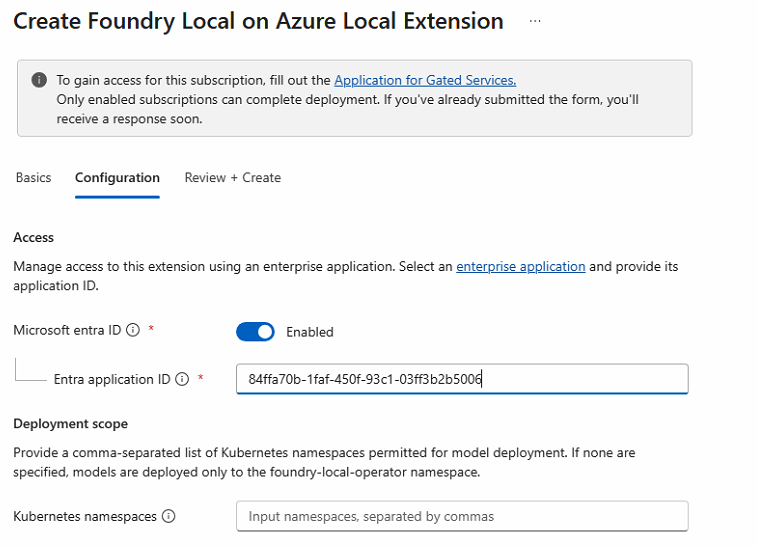
On the Configuration tab, enable Microsoft Entra ID and paste in the Entra application ID from Step 2. The Kubernetes namespaces field is optional — if left blank, models can only be deployed to the foundry-local-operator namespace.
On Review + create, verify the summary and click Create.
Option B — Azure CLI
Update (October 2026) — major version 1.260914.4:
- —auto-upgrade-minor-version true is now deprecated and replaced with —auto-upgrade-mode compatible.
- api.config.server.workers and api.resources.limits.memory is not required anymore.
For the current major version update, this is the command shape I use:
az k8s-extension create `
  --resource-group "rg-weu-ckj-prod" `
  --cluster-name "azlckj5-k8s" `
  --name "inference-operator" `
  --extension-type Microsoft.Foundry `
  --scope cluster `
  --release-namespace "foundry-local-operator" `
  --cluster-type connectedClusters `
  --auto-upgrade-mode compatible `
  --release-train stable `
  --config entraAuth.tenantId="7de6b2d4-2134-407d-abb8-4a1a36a300e4" `
  --config entraAuth.clientId="84ffa70b-1faf-450f-93c1-03ff3b2b5006"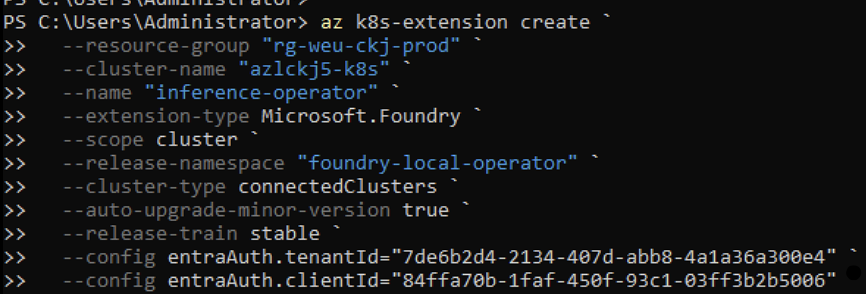

After a few minutes the extension shows as Succeeded in the portal:

HINT
I chose to uninstall and reinstall the extension instead of in-place upgrade. End goal is the same: move to
1.260630.4and align to the new prerequisites.
Important note about tuning parameters for 1.x
Update (October 2026) — major version 1.260914.4:
- api.config.server.workers and api.resources.limits.memory is not required anymore, but below info is kept for reference.
After a new validation session with Microsoft product group, I can confirm my lab still needed the following settings on 1.x:
--configuration-settings api.config.server.workers=1
--configuration-settings api.resources.limits.memory=2G
If I do not set these in my environment, deployment/runtime behavior is not stable. Treat them as required in your runbook for now, and re-test when new release guidance is published.
HINT
The
--release-namespacecontrols where the operator itself runs. The defaultfoundry-local-operatornamespace is also where you will deploy yourModelDeploymentresources unless you explicitly add more namespaces via the extension configuration.
Existing installation? Upgrade options
If you already run Foundry Local on Azure Local:
- Arc extension path: follow the official extension guide and use the major update flow for
1.260630.4:https://learn.microsoft.com/en-us/azure/azure-sovereign-clouds/private/foundry-local/deploy-foundry-local-arc-extension?tabs=powershell - Helm path: run:
helm upgrade --install inference-operator `
oci://mcr.microsoft.com/microsoft.foundry/foundrylocalenabledbyarc/helmcharts/helm/inference-operator `
--version 1.260630.4 -n foundry-local-operator --create-namespace `
--set entraAuth.enabled=true
Step 5 — Browse the model catalogue
The operator stores the curated Foundry model catalogue in the foundry-local-catalog ConfigMap, under the catalog.json key. You can read it with kubectl and format the available models as a table in PowerShell:
kubectl get configmap foundry-local-catalog `
  --namespace foundry-local-operator `
  -o jsonpath="{.data['catalog\.json']}" |
  ConvertFrom-Json |
  Select-Object -ExpandProperty models |
  Format-Table alias, displayName, task, framework -AutoSize
Update (October 2026): I confirmed this command works with my current installation. The older kubectl get modelcatalog command no longer applies; it returns the server doesn't have a resource type "modelcatalog".
To inspect the complete catalogue JSON, including model variants and sizing details, use:
kubectl get configmap foundry-local-catalog `
  --namespace foundry-local-operator `
  -o jsonpath="{.data['catalog\.json']}"
The screenshot below is from my earlier installation and shows the entry for qwen3-0.6b-generic-cpu — a CPU-friendly Qwen3 0.6B model packaged for ONNX. The catalogue structure and available models can change between preview versions:
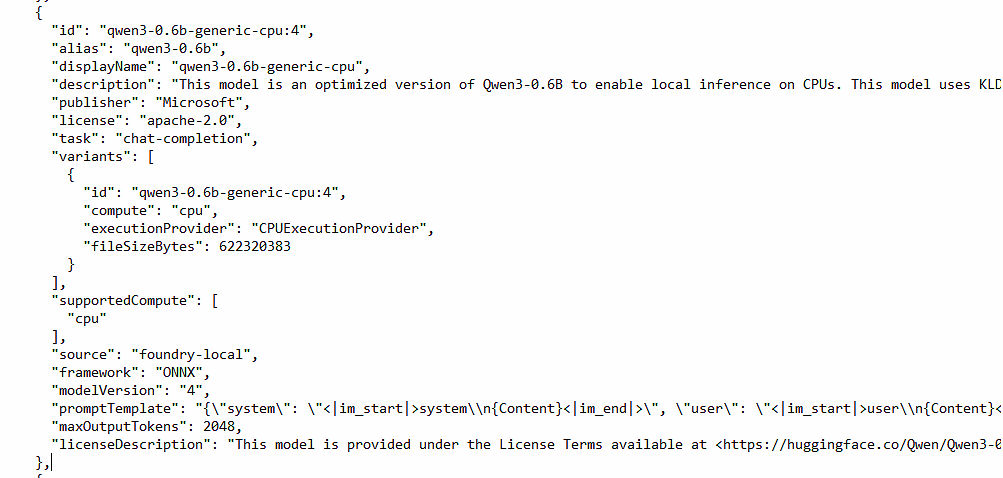
Before deploying, inspect the chosen model’s variants for compute requirements, framework, and file size — useful for sizing the worker node before scheduling the pod. In the earlier output shown above, these details included compute (cpu or gpu), executionProvider (e.g. CPUExecutionProvider), and fileSizeBytes.
For the current catalogue commands, see Deploy a catalog model on Foundry Local - List available models.
Step 6 — Deploy a model
If your model stays in Creating, see Part 8 - Fix: Foundry Local model stuck in Creating. I walk through diagnosing an unscheduled cache job and reducing its memory requirements on smaller worker nodes.
A model is deployed by applying a ModelDeployment custom resource. I started with the small Qwen3 0.6B CPU variant. Save the following as model-deployment.yaml:
apiVersion: foundrylocal.azure.com/v1
kind: ModelDeployment
metadata:
  name: qwen3-0-6b-generic-cpu
  namespace: foundry-local-operator
spec:
  model:
    catalog:
      name: qwen3-0.6b-generic-cpu
      version: "latest"
  compute: cpu
  runtime: onnx-genai
  workloadType: generative
  replicas: 1
  port: 5000
  skipGpuResource: true
  nodeSelector:
    kubernetes.io/os: linux
  resources:
    requests:
      cpu: "1"
      memory: "2Gi"
    limits:
      cpu: "2"
      memory: "4Gi"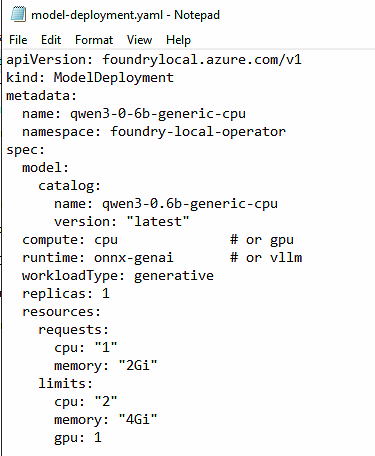
Apply it:
kubectl apply -f model-deployment.yaml
After the operator pulls the model files and the pod becomes ready, the ModelDeployment shows STATE: Running and READY: true:
kubectl get modeldeployment "qwen3-0-6b-generic-cpu" -n foundry-local-operator
Step 7 — Get the API key and reach the endpoint
Each ModelDeployment gets a dedicated Kubernetes Service and a generated API key stored in a Secret. To talk to the model from my workstation I port-forward the service to localhost:
kubectl port-forward svc/qwen3-0-6b-generic-cpu -n foundry-local-operator 5000:5000
Then fetch and base64-decode the API key:
$secret = kubectl get secret qwen3-0-6b-generic-cpu-api-keys -n foundry-local-operator -o jsonpath="{.data.primary-key}"
[System.Text.Encoding]::UTF8.GetString([System.Convert]::FromBase64String($secret))
Step 8 — Verify the model is healthy from inside the pod
Before invoking the model from outside, it is worth confirming that the inference container itself is healthy. Exec into the pod and hit the local /v1/models and /health endpoints directly — this bypasses the nginx sidecar so you know whether any later 5xx is a backend issue or a fronting/ingress issue:
kubectl get pod -n foundry-local-operator -l app.kubernetes.io/name=qwen3-0-6b-generic-cpu

kubectl exec -n foundry-local-operator qwen3-0-6b-generic-cpu-f6fbd6996-k7nts -c inference -- curl -s http://127.0.0.1:5000/v1/models
kubectl exec -n foundry-local-operator qwen3-0-6b-generic-cpu-f6fbd6996-k7nts -c inference -- curl -s http://127.0.0.1:5000/health
In my case the backend returned {"status":"healthy"} and the model was listed correctly — so the model itself was fine.
Step 9 — Call the chat completions API
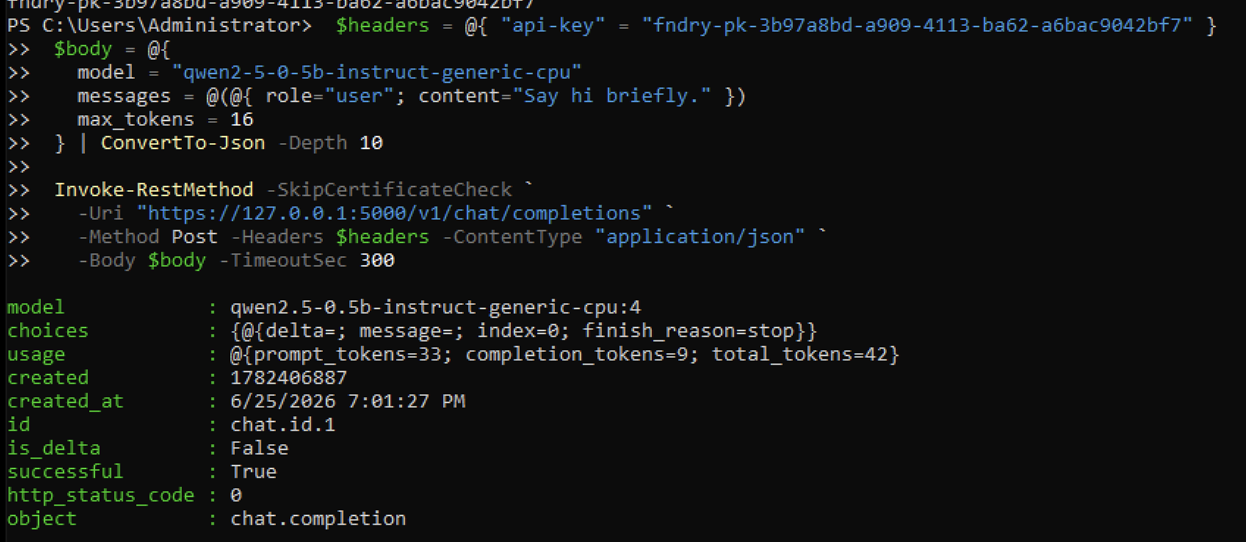
With the port-forward still running and the decoded API key in hand, call the OpenAI-compatible endpoint with PowerShell. The certificate is self-signed at this stage, so -SkipCertificateCheck is required:
$headers = @{ "api-key" = "YOUR-API-KEY-HERE>" }
$body = @{
  model    = "qwen3-0-6b-generic-cpu"
  messages = @(@{ role = "user"; content = "Say hi briefly." })
  max_tokens = 512
} | ConvertTo-Json -Depth 10

$response = Invoke-RestMethod -SkipCertificateCheck `
  -Uri "https://127.0.0.1:5000/v1/chat/completions" `
  -Method Post -Headers $headers -ContentType "application/json" `
  -Body $body -TimeoutSec 900

$response.choices[0].message.content
The first invocation in my lab came back successful — successful : True, http_status_code : 0, object : chat.completion:
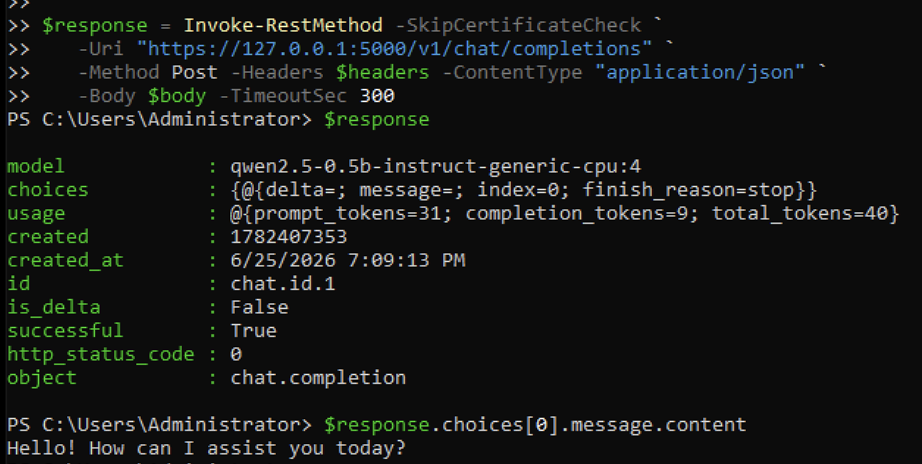
With a slightly longer prompt, I got the expected text response:
Final remark
The important update is this: Foundry Local on Azure Local preview moved to a new major version, and that means we should treat upgrades as a real lifecycle event, not a small patch.
Plan and validate these items in order:
- Gateway API + Istio prerequisites
- Extension upgrade (or uninstall/reinstall, if that is your chosen path)
- Model redeploy and endpoint validation
- Updated operating guidance (include worker and memory tuning on
1.xuntil guidance changes)
Foundry Local on Azure Local is still preview, but the platform is moving fast. Keeping your runbook aligned with each release note is the safest way to avoid surprises in production-like labs.
Have feedback on this post?
Send me a message and I'll get back to you.